
As two people who have some of the most expensive hobbies going round, we really could have done with one that didn’t involve expensive equipment, regular upgrades or heaps of flights. Unfortunately we have not succeeded at all.
We jumped on the new photography must-have and bought ourselves a drone! After seeing hundreds (maybe thousands) of amazing aerial photos on Instagram there was no question when it came to what I wanted for my birthday – a drone please!
We definitely should still be on our flying L plates (Thom is a much better pilot than I am), but we are having so much fun exploring the world from the sky as often as we can. Last weekend we took our new toy down the Great Ocean Road with our good friend Dean Faulkner, who showed us the ropes to getting better images.
No matter which drone you have decided to buy, they all work in a similar way. Many of them, such as some of those in the DJI family, even share a phone app together, so no matter what drone you’ve purchased you should be able to use these tricks! Here are some tips to perfecting your aerial photography.

In this post:
Choose the right location
If you’re still learning, like us, avoid flying in places where you’re not 100% comfortable. This might be anywhere where you’re a little close to trees, power lines or buildings, or where there are too many people. Although it might be boring, the best place to learn is a wide open space where you can drive as crazy as you want for practice without worrying about crashing.
We are definitely getting more confident, but as soon as we pulled the drones out at our first stop we had a small crowd watching what we were doing and we lost our nerve. Dean has been flying much longer than us though, so he was able to get some amazing footage.
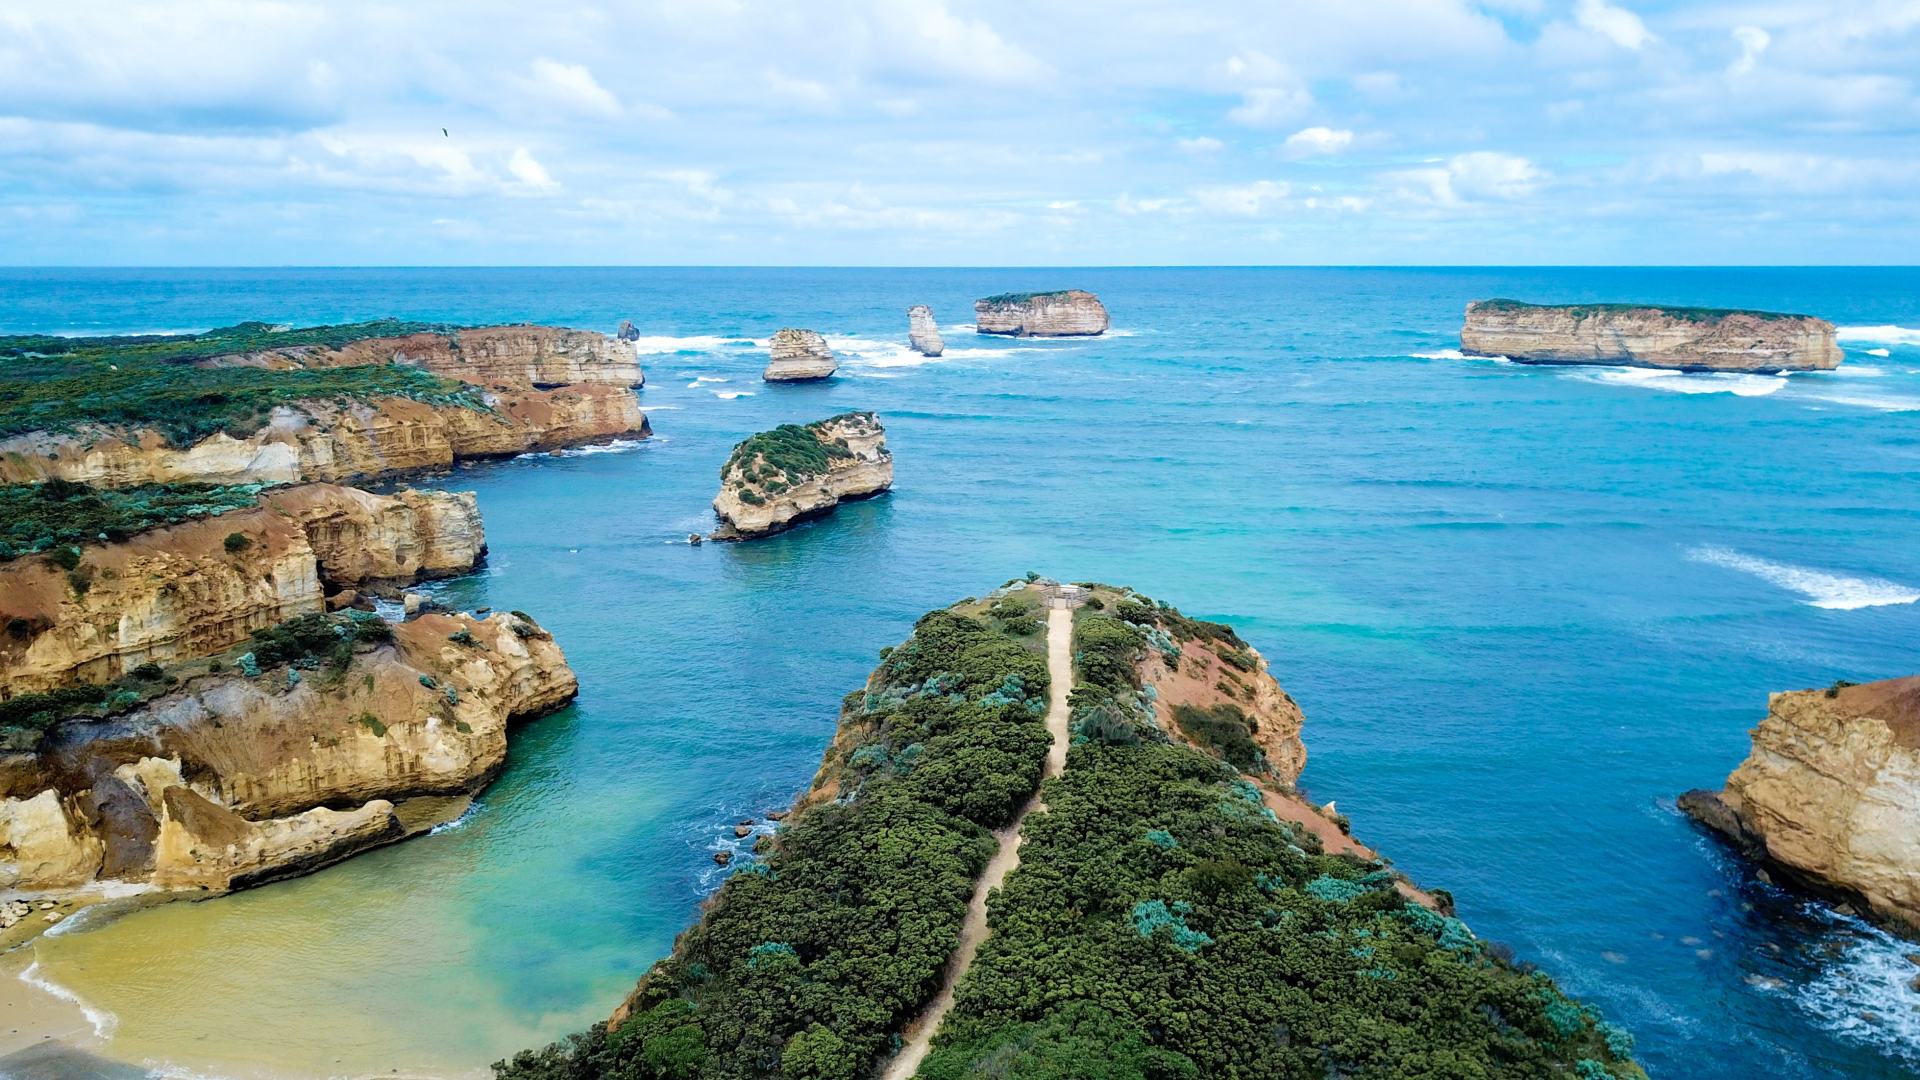
Moving onto Loch Ard Gorge we were able to find a good spot to launch from in the parking lot, which gave us a lot more privacy with less people around watching, so it was great to be able to really practice with a great landscape to shoot. No matter how beautiful the place you want to fly, there’s no point if you can’t control your drone or manoeuvre it into the positions you want to.
Practice, practice, practice!

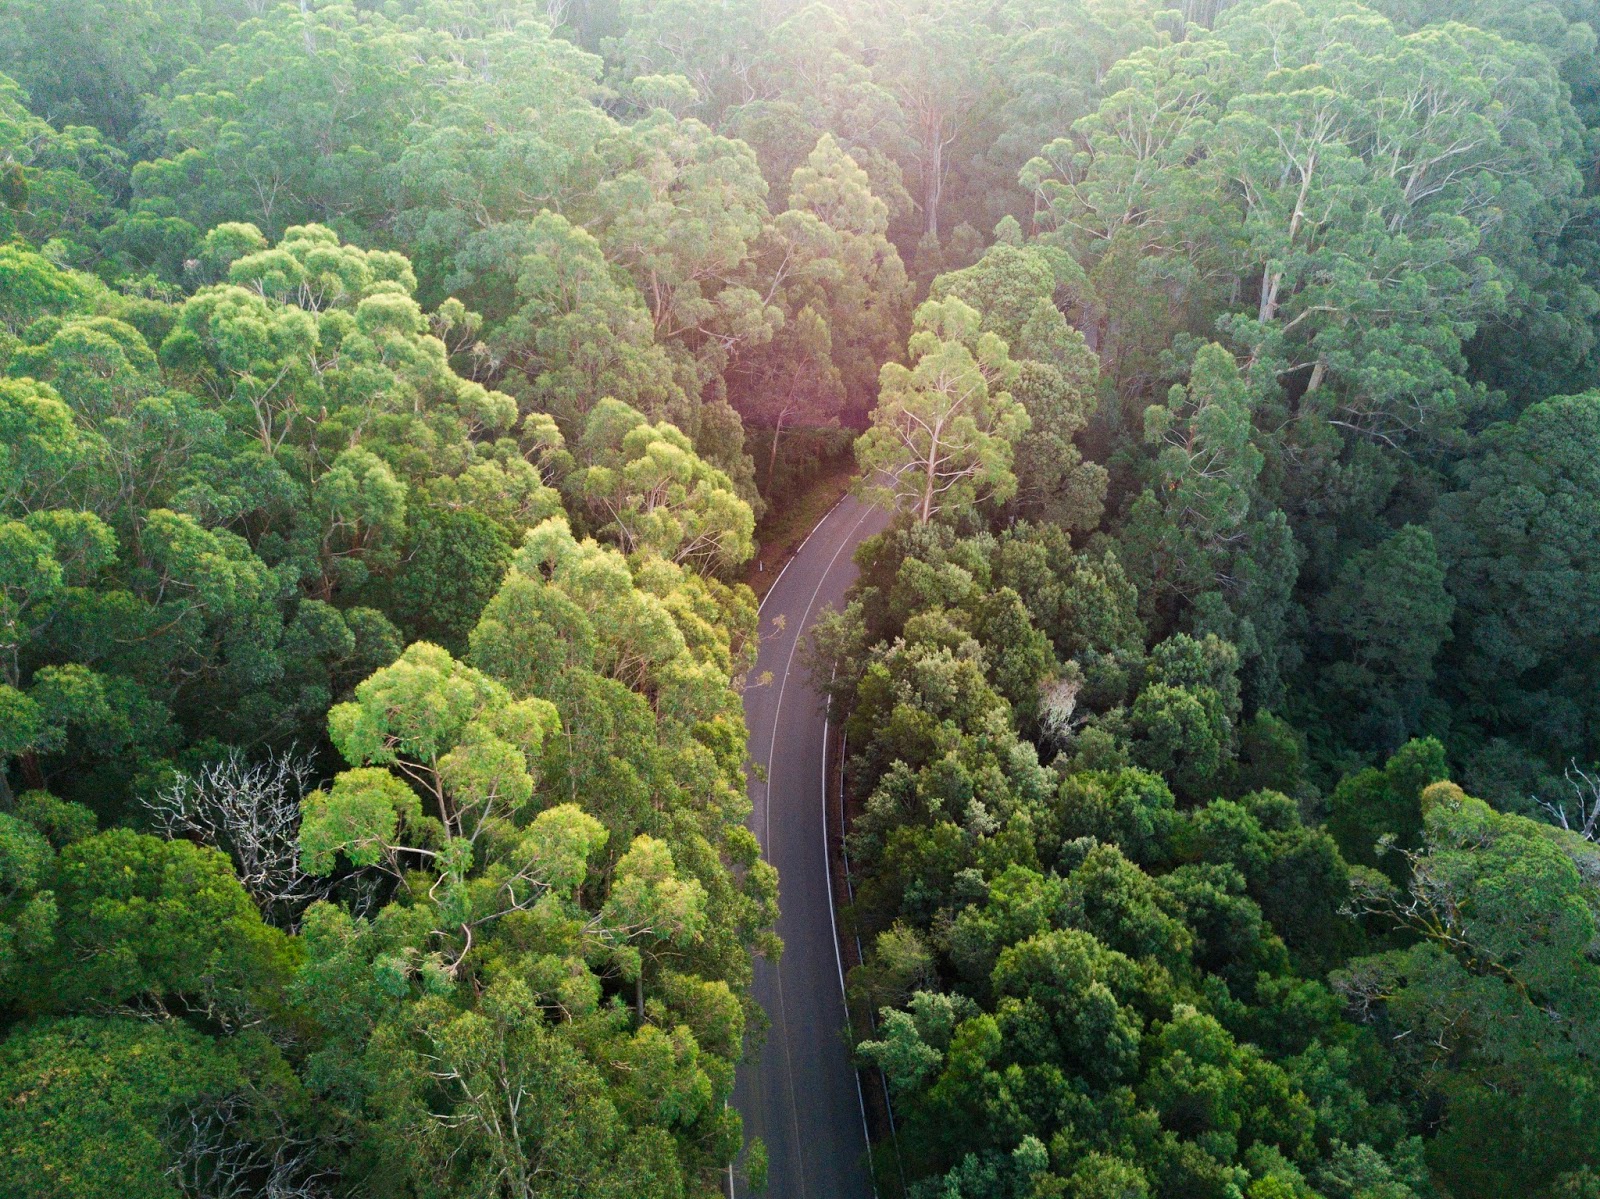
Think with a different perspective
The absolute best thing about having a drone is that you can get to view points that you wouldn’t normally be able to see from the ground or general lookouts.
Think about your angles when you’re shooting – what would be interesting, different and unique for your photos?
What would make them stand out and have an alternate perspective than all the other photos in this area? It doesn’t necessarily mean that that angle is straight from above looking straight down (although, these are also pretty phenomenal photos).
For example, the above photo of Loch Ard Gorge is definitely not an angle you could take a photo from yourself. Maybe if you were hanging out of a helicopter, but that’s about it. These kinds of angles is what makes having a drone worth it!
Check the weather reports
While this should always be a priority before flying to make sure the wind conditions are okay to fly, I also like to try and get out on sunnier days. This is completely just personal opinion, but the world is a happier place to me on sunny days. The ocean sparkles, the lighting is brighter, and the colours of your environment are so much more vibrant.
Taking your drone out on sunny days definitely offers better shooting conditions in my opinion, with less dark shadows to contend with and more natural light for your images.
Take your photos as still as possible, not on the go
Although this might seem obvious, it also might be something you don’t pay attention to until it’s too late and movement has ruined one of your favourite images. It’s something I noticed very early because as a kid who never had a PlayStation or Nintendo and feels a little bit joystick illiterate, I will often get Thom to fly for me, while I direct and take the photos. Sounds silly, but it’s still a new baby to me and I am scared to crash it!
In a couple of our early images we can see the difference between images where I have asked him to stop and where I have just taken photos as he flies around. Once you have your drone in the right position, give it a few seconds before you take the picture to make sure it is as still in the sky as possible.
These new propellers also helped a lot with stability, flight time and noise reduction.
Make sure everything is prepared before you go
Charge your batteries and controller, make sure your firmware and apps are up to date and your memory card is formatted. The last thing you want is to be all ready to go and then your drone won’t let you fly because it says it needs a firmware update. Being prepared will not only make your day a lot smoother, but it will also allow for the maximum time flying and not draining your battery from the ground.
Depending on your model, batteries don’t last very long – ours only has a life of about 25 minutes, so it’s a great idea to pick up some extra batteries to get the most out of your days.
Have we convinced you to buy a drone yet? Check out our SHOP to see our drone, and all our favourite accessories to take the perfect photos!
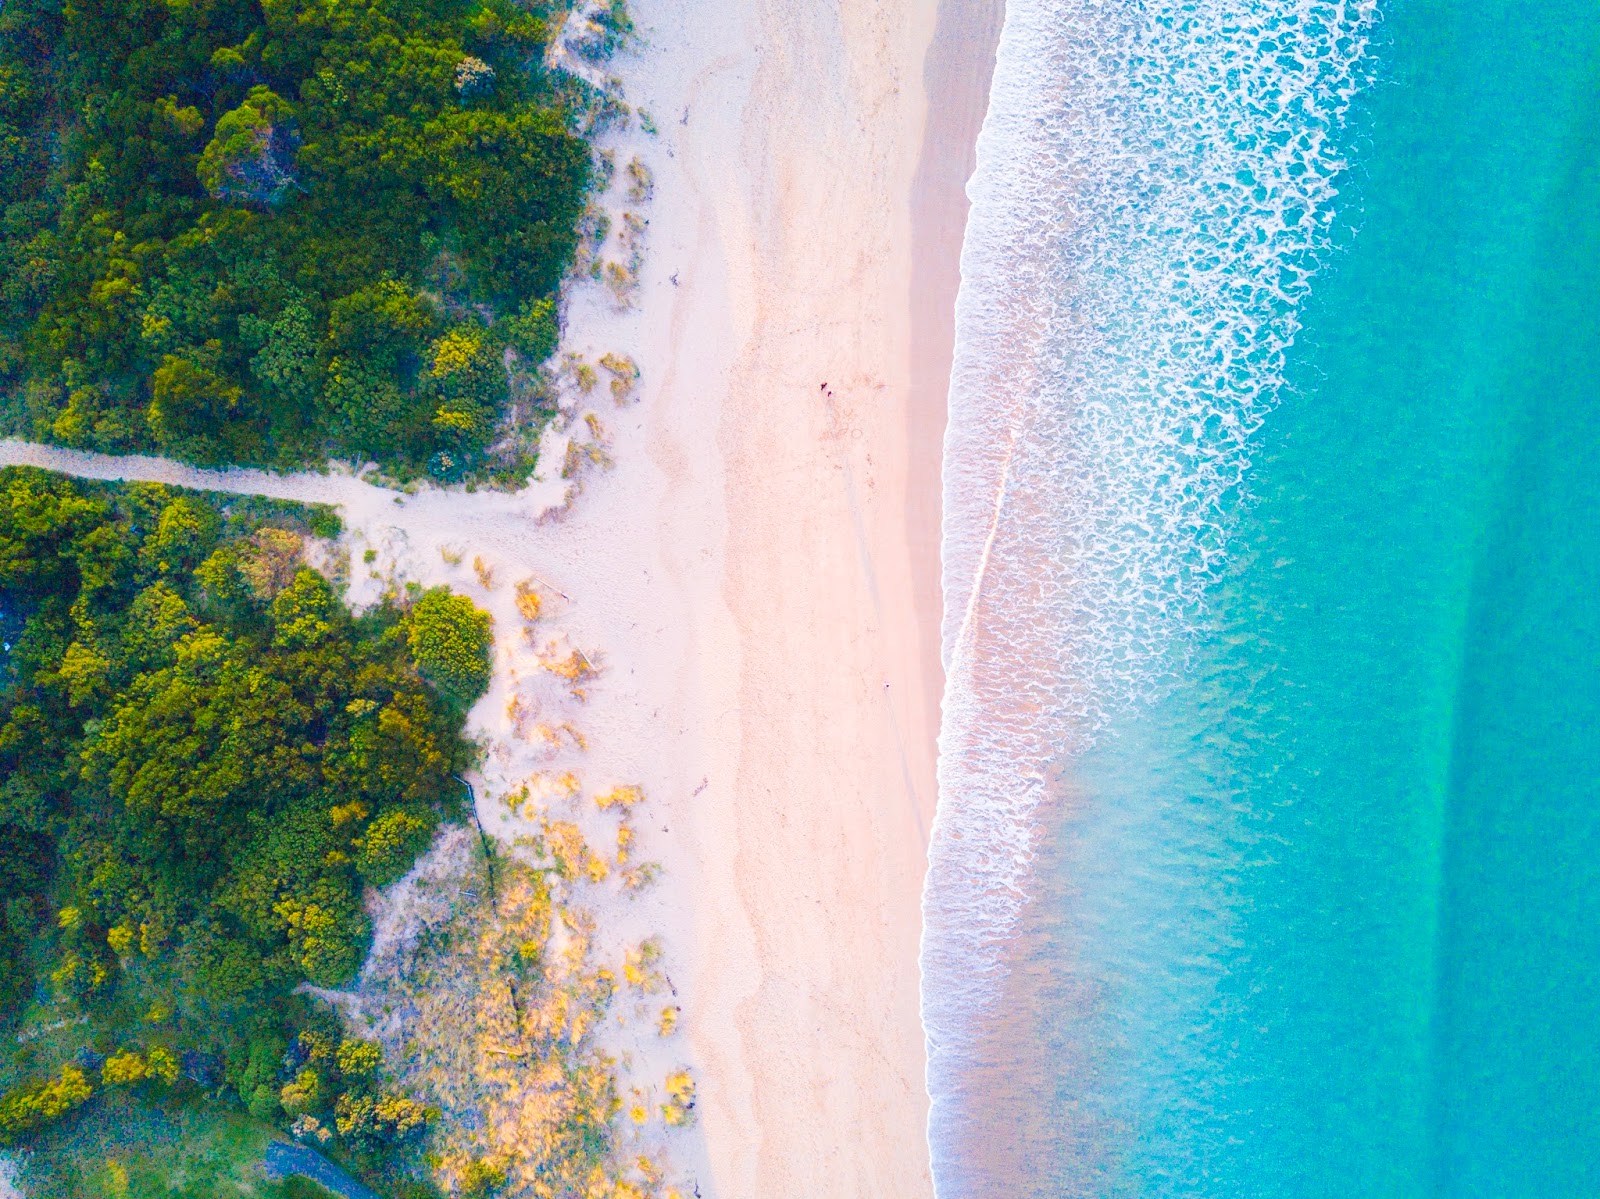
Shoot your images in RAW format
Embarrassingly, something I had paid very little attention to until I was editing the above images of Apollo Bay. Shooting your images in RAW allow you to correct the smallest flaws in colour or exposure with absolute precision and is something most photographers are very passionate about.
This is probably even more important with aerial photography, due to the unsteady nature of the images and the limited settings you can adjust when you’re shooting. RAW images give you so much freedom when correcting colours or exposures. The biggest difference between .jpg and RAW for me is what you can do with light and sunshine. It can really make a beautiful difference to your images.
I am definitely still learning my way around my drone and everything that it can do, so in no way do I think I am an expert on this topic. I would love to hear any tips or tricks you have to taking those perfect photos from the sky!
Check out more of our photography travel tips
Pin for later >>

Happy travels,
 If you enjoyed this post, we'd love you to SHARE it for us!
Follow us on Instagram @EXPLORESHAW to see our latest adventures around Australia.
CHECK OUT OUR TRAVEL FAVOURITES:
If you enjoyed this post, we'd love you to SHARE it for us!
Follow us on Instagram @EXPLORESHAW to see our latest adventures around Australia.
CHECK OUT OUR TRAVEL FAVOURITES:
![Fujifilm X-T3 Mirrorless Camera]()
![Ultimate Weekends Australia]()
![La Tan Coconut Sunscreen]()
![Nikon Z fc Mirrorless Camera]()
![DJI Mavic 2 Pro Drone]()
![Frank Green Insulated Drink Bottle]()
![Manfrotto Tripod]()
![Lonely Planet Australia Travel Guide]()
![Will & Bear – Calloway Fawn Hat]()
![Sony RX100 VI Camera]()
![Bushmans with Sunscreen]()
![Havianas Slim Thongs in Rose Gold]()
![Australia Planning Map]()
![Casetify Tropical Palm Neon Sands iPhone Case]() CLICK HERE TO SUBSCRIBE to our newsletter, for blog posts and updates emailed straight to your inbox!
Use THIS LINK for $25 AUD off your next hotel stay with booking.com, or THIS LINK for $55 AUD off your first booking with airbnb.
CLICK HERE TO SUBSCRIBE to our newsletter, for blog posts and updates emailed straight to your inbox!
Use THIS LINK for $25 AUD off your next hotel stay with booking.com, or THIS LINK for $55 AUD off your first booking with airbnb.


4 Comments
nice post
i you want to take good quality pictures that you need to take great quality best rc drones then you should get a propelled ramble that is fit for achieving statures of 300 feet or more.
I loved your article. But I have a question. You got this nice picture at the twelve apostles but in your other article you state that you cannot fly a drone there. So how did you accomplish that?
Hi Paul,
Good pick up and thank you for bringing that to our attention! That photo was actually taken (and this post was written) many years ago, when there was no signage against drones at the 12 Apostles and before the rules around where you can and can’t fly your drone were common knowledge. We have updated the post with new images so there is no confusion and will actually take the time to update this whole post with some more tips and tricks as soon as we can, since we’ve been flying our drone for quite a few years now 🙂
Thanks for reading!